

The Lid Lab
- Mar 7, 2023
- 3 min read
Updated: Oct 12, 2025
The steps for rhinestoning a tumbler lid involve preparing the surface, applying a base layer of rhinestones, filling in the design, and allowing it to cure completely. There are two main methods for rhinestone placement: the honeycomb method for an organized pattern or the scatter method for a random, full-coverage look.
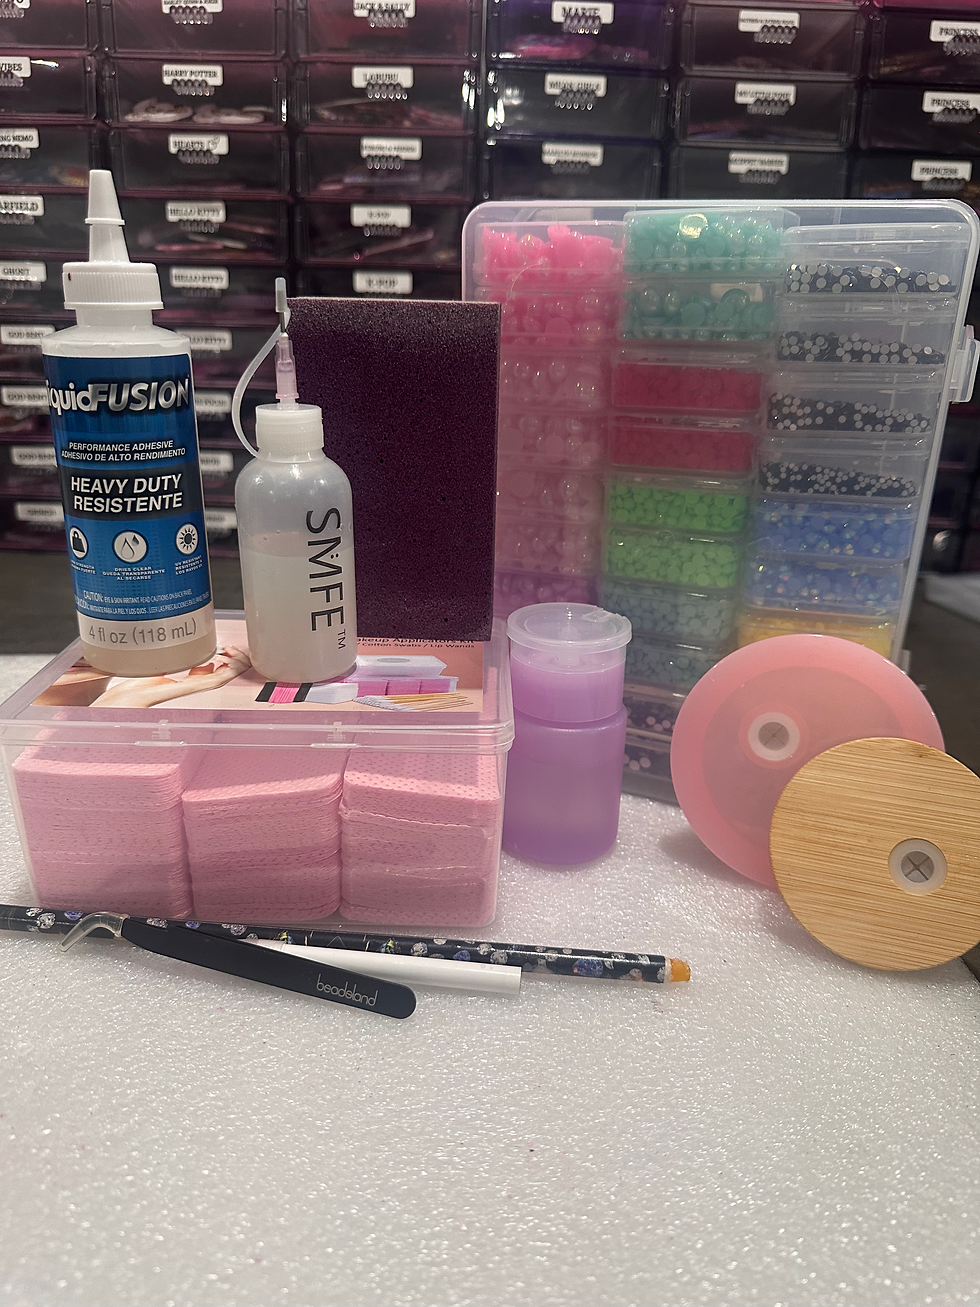
Gather materials
Tumbler lid
Flatback rhinestones in various sizes (e.g., SS6, SS10, SS16, SS20)
Strong adhesive, such as E6000, SuperTite Fusion Tack, or Liquid Fusion
Rhinestone pick-up tool or wax pencil
Syringe with a blunt-tip needle (for precise glue application)
Fine-grit sandpaper (around 220 grit)
Rubbing alcohol and paper towels or coffee filters
Optional: Acrylic paint or glitter in a matching color
Prepare the lid
Remove the seal. Take out the rubber or silicone seal from the lid's edge and any other removable parts.
Sand the surface. Lightly sand the entire outer surface of the lid with fine-grit sandpaper. This creates a mechanical bond and helps the rhinestones adhere better.
Clean the lid. Thoroughly wipe the lid with rubbing alcohol to remove any dust, oil, or debris left from sanding. Allow it to dry completely.
Add a base color (optional). For a solid, opaque look, you can paint the lid with a color-matched acrylic paint or use glitter mixed with a clear adhesive like UV resin. This helps to hide any gaps.
Apply the rhinestones
Edge first. Begin by applying a single, straight row of rhinestones around the outer edge of the lid using an adhesive. Starting with a larger size, like SS20, can provide a clean foundation. Allow this row to dry completely to prevent the stones from shifting.
Use the honeycomb or scatter method.
Honeycomb: For an organized pattern, apply rows of rhinestones by placing each new stone in the gap between two stones in the row below it. Use a consistent size for a uniform pattern.
Scatter: For a random, full-coverage look, apply glue in small sections and sprinkle or place a mix of different-sized rhinestones (e.g., SS6, SS10, SS16) to fill the area. This method is often easier for beginners.
Work in small sections. Apply glue sparingly to a small area at a time. This prevents the glue from drying before you can place the rhinestones.
Place the stones. Use your rhinestone pick-up tool or wax pencil to place each rhinestone. Gently press them into the adhesive, but avoid using excessive pressure, which can squeeze out too much glue.
Fill the gaps. Use smaller rhinestones to fill any remaining tiny gaps for a complete, full-coverage look.
Avoid straw opening. Be careful not to block the straw opening with glue or rhinestones.
Cure and finish
Allow to dry. Let the lid cure for at least 24–72 hours, or according to your adhesive's instructions. This ensures the stones are completely set.
Clean up. Once the adhesive is fully cured, gently clean the lid with a mild dish soap and a soft brush to remove any glue residue.
Do not seal. Avoid applying a sealant or top coat over the rhinestones. This will dull their sparkle and is not necessary with a strong adhesive.
Replace the seal. Re-insert the rubber or silicone seal into the lid.


Comments